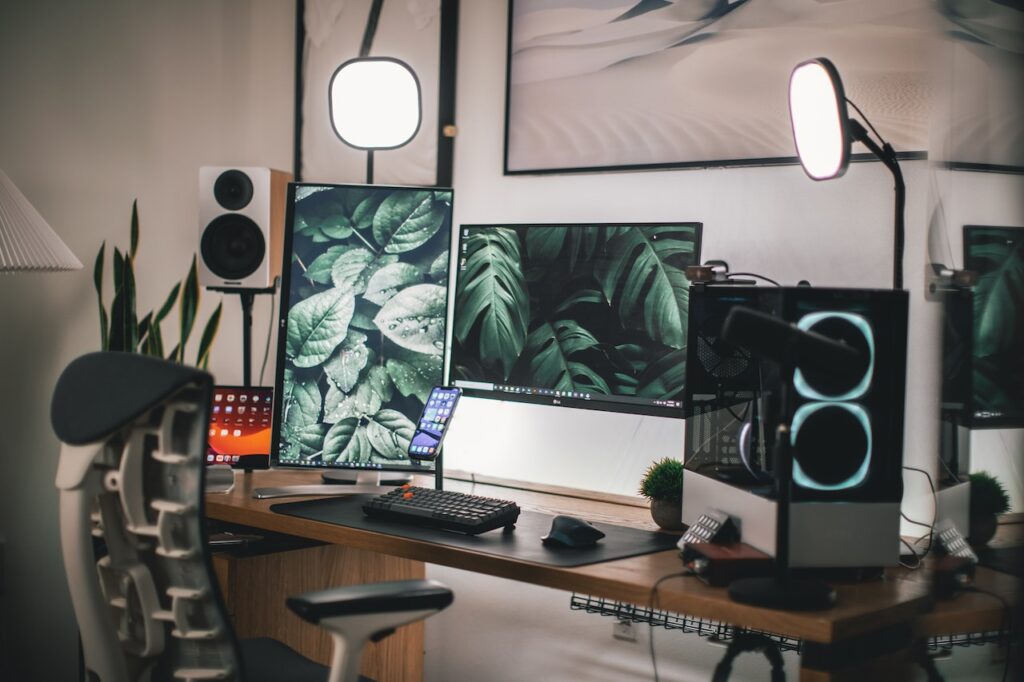
You’ve scrolled through Pinterest until 2 AM wishing you could design a gaming room of your own one too many times, and you’ve come to a decision:
You want to make those dreams a reality.
But… Where do you even start? How do you design a gaming room? What does a gaming room need? How much does it cost? How the heck do you plan all of this out?
Especially if you’re starting from scratch, designing a gaming room can be super intimidating. That’s why I’ve created this guide!
You’re not just going to learn what you need to do–I’m also going to give you some of my best tips that I discovered when designing my own gaming room!
First, we’ll look at a few questions you might have before you start. Then, I’ll break down my 9-step process for getting inspired, making plans, and making purchases for your gaming setup.
Let’s do this!
What does a gaming room need?
If you’ve never designed a gaming room, you’re probably wondering what you need! Luckily, it’s mostly up to you and your tastes, but here are a few staples:
- Your consoles, PC, and/or mobile device
- A gaming chair (or just anywhere comfy to sit!)
- A table, desk, or entertainment stand for your PC and/or console and TV
- Outlets for all of the wires (this is an easy one to forget, but it’s a must!)
I would say this is the bare minimum for what you actually need, but you can be as minimal or as maximal as you want with your setup.
How much does a gaming room cost?
Again, it totally depends on what you want and how much you’re willing to spend. If you want to use what you already have, then it’s free! However, maybe you’re going all the way and adding an additional room to your home. That will be a lot pricier!
Here are some pricing brackets to give you a better idea about gaming room costs:
Small Steps ($0)
Making due with what you have may be the best choice.
- Using stuff you already own
Decorating ($20-249)
“Beautifying” an existing gaming room setup
- Wall art
- Desk mats
- Accessories
- Lighting
Revamp ($250-999)
Adding new big-ticket items in addition to decor
- Desk
- Gaming chair
- Monitor/TV screen
All New ($1k+)
You’re pulling out all the stops (and then some!).
- Top-of-the-line PC
- High-quality desks and chairs
- Interior/exterior remodeling
How do I plan my gaming setup?
If you’re a planner nerd like me, this is where things get fun! We’ll dig into this deeper soon, but the most important point is to plan BEFORE you buy. Here are some other tips:
- Shop around and research! You’ll want to compare a lot of different items to make sure you make the best and most educated decision–especially for the higher-ticket items like gaming chairs and consoles.
- Pay attention to how you would use a furniture item to see what would work best. As an example, I wanted an L-shaped desk so I could have two different “workstations” that I could easily switch between. However, I noticed that most L-shaped desks have support in the nook of the L that you can’t move your legs through. I found the perfect one that doesn’t have extra supports and is still sturdy!
- Focus on what you FEEL as much as what you like. If you love the color red but want to design a gaming room that feels cozy, you might feel better with pops of red rather than using red as the main color.
The bottom line is to ask yourself questions and do your research!

How to Design a Gaming Room in 9 Steps
1. Decide on a location
The first step in designing your gaming haven is to choose a location. You probably have already decided on a location, but if you haven’t, make sure you choose a location that:
- Has enough room for you, other players (if you’re a social gamer), your gaming tech, and your furniture
- Has access to electrical outlets
- Stays a respectful distance from everyone else in your household
You may have a location that already serves a similar purpose. For example, some people will have dual gaming room/offices or gaming room/living rooms. If that’s the case and you’re already low on space, I’d highly recommend this!
I personally have a gaming room that also serves as my office, and it’s the best room in the house by far. It’s so cute from the gaming decor that the work even feels more fun!
2. Decide on a gaming theme or aesthetic
Who doesn’t love a good aesthetic gaming room? Plus, there are SO many possibilities for themes to choose from. Here are a few examples:
- Choose one color and base your design around it
- Choose a natural location, like the ocean or a woodland forest
- Choose a vibe and run with it! (This could be cozy, kawaii, spooky, energetic, edgy, etc.)
And, of course, in the year 2022, I’d be silly not to include the aesthetic “cores.” As an aficionado but not an expert, I’ll refer you to the aesthetic -cores list in the aesthetics fandom wiki.
3. Get inspired
Now is the time to get on Pinterest (if you weren’t already!) and find some designs that inspire you. I’d also highly recommend checking places like Twitter, Instagram, and TikTok for visual inspiration.
And remember, you don’t even necessarily need to be looking for gaming setups. Try looking at offices, living rooms, and entertainment rooms as well. You may even want images of certain art pieces that you like, or color palettes. There are no rules!
My best tip: try to find pictures of complete designs that are about the same size as your gaming room location is. This makes it so much easier to visualize how things would actually look when you finalize your gaming room design.
4. Make a list of what gaming furniture, accessories, and tech you need
It’s list time! You know what basics you need: a desk, table, gaming tech, and outlets. Here are a few other items you might put on your list:
- More games (this one never gets checked off, let’s be honest)
- Wall art
- An additional screen or monitor
- Additional controllers
- Desk mat or mouse pad
- Mouse
- Headset
- Storage boxes to keep consoles and controllers organized
- Console/controller skins
- Cases
- Game disc/cartridge organizers
- Lighting
- Figurines, plushies, or other game-inspired items
- Beverages and snacks (this is crucial, don’t @ me)
- A side table for beverages and snacks (equally crucial)

5. Determine your budget
While we would all love to drop several grand on our dream gaming room (#goals) many of us have only so much we can spend.
That’s why it’s important to have two types of budget:
- Total budget for the project
- Budget per item
You’ll want to set an amount that’s reasonable for your income and your existing investment. For example, if your favorite aesthetics change every few months, don’t spend as much on decorations when you know you’ll end up replacing them. Meanwhile, if you eat, sleep, and breathe the color purple, you probably don’t need to think twice!
The same goes for your love of gaming and certain consoles. If you’re usually a mobile gamer but you just got your first console, I’d advise you to spend less as you’re not sure how big this new addition will be in your life.
Finally, keep in mind that your budget can extend over time. Maybe your total budget is $1,200, but you can only afford $100 a month. That works perfectly fine, too!
6. Research the items from your list
Be sure to do your research before making a purchase! Compare the items you want with others and compare them on things like price, specs, quality, size, etc. Typically, you want to find the item that is the best value, so you get the most bang for your buck.
The best place to start is Amazon. Here is what I would suggest for a process:
- Choose an item from your list
- Examine at least 3 different options for that item
- After you inspect each item, if you would consider buying it, add it to your cart
- Repeat with each item on your list
This will help you segue smoothly into the next step.
7. Prioritize which gaming room items you need most
One of the best tips I can give you is to prioritize where you spend your money throughout your gaming room design process. You’re going to want to allocate the most money toward the items that you absolutely need–like your chair, desk, console, etc.
So, if your cart goes over budget, try trimming down on the items that aren’t as crucial. For example, if you’re $20 over budget, you might buy one fewer decoration.
Meanwhile, if you’re $100 under budget, you may want to invest that and upgrade one of your big-ticket items instead of adding more decorations.
8. Order your gaming room furniture and decor
You came, you added to cart, and now?
You buy.
(And then wait, staring longingly out the window while you wait for the mailperson, refreshing the ETA every hour. Godspeed.)
9. Arrange and finalize your gaming setup
Once all of your furniture, tech, accessories, and decorations are in, it’s setup time! I’d suggest trying a few different layouts (at least in your head) before finalizing the gaming room design.
And, now that everything’s set up… get playing!

Summary: How to Design a Gaming Room
Let’s go over what you’ve learned in this guide. Here are the 9 steps to designing a gaming room:
- Decide on a location
- Decide on a gaming theme or aesthetic
- Get inspired
- Make a list of what gaming furniture, accessories, and tech you need
- Determine your budget
- Research the items from your list
- Prioritize which gaming room items you need most
- Order your gaming room furniture and decor
- Arrange and finalize your gaming setup
I hope this has given you some more confidence and know-how for when you design your game room and plan your gaming setup!
Game on!

